Thank you for purchasing the October Ideas package. I love fall and always look forward to this time of the year! I have put together a collection of my favorite October activities. Many of these things would be great for any primary classroom.
****Please note that these files are optimized for Adobe Reader version 7 or newer. You may be unable to print correctly if you have an older version of this program. This program is free at the following link.
![]()
Patterned Pumpkins

Each year we make patterned pumpkins with a jack-o-lantern face. Each child starts with a pumpkin shape. I have provided five different shaped pumpkins to add some variety! I love seeing lots of different shapes rather than all of the children's projects looking the same. I have used white drawing paper or white construction paper for this project--either one works fine.
Patterned Pumpkins PDF for all jack-o-lantern faces, pumpkin patterns (pictured below) and banner.
Pumpkin Patterns


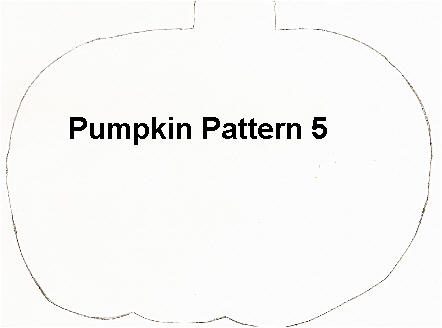
Each child needs one pumpkin pattern. Before we draw the faces on the jack-o-lantern, we have a class discussion about what different kinds of faces are on jack-o-lanterns---funny, scary, happy, sad, etc. I show them different styles of faces and how they can make their own faces with eyes, nose and mouth from the different examples. They might choose the eyes from one pumpkin, nose from another, and the mouth from another? I have provided several different styles of jack-o-lantern faces for you to copy and to show the children.
I have the students draw a jack-o-lantern face in pencil until they are satisfied with the face they have drawn. Then, he/she uses black crayon to trace over the pencil lines and color in each facial part with black crayon. I have found it much easier to make the black face on the pumpkins before adding the tissue paper strips. Encourage the kids to press hard and color dark with the black crayon.

Orange and yellow tissue paper is cut into 12x1 inch strips. Each child will need about 9-13 strips to complete their pumpkin pattern. I used white glue in a small container and add a few drops of water to thin the glue. This makes it easier to paint the glue on the pumpkin pattern. The glue should not be too thin or it creates a problem with the dye in the tissue paper "bleeding." We use a paint brush to paint the entire pumpkin with glue. I encourage them to go outside the black lines when painting the pumpkin with glue to make sure the edges are secured with glue, too.
Applying the strips:
 The strips will need to
be handled carefully as they are applied to the paper with wet glue. I
demonstrate how to hold each end of the tissue paper strip and lay it down
flat ---don't slide it! The strips should extend over and past the black
line of the pumpkin. The pumpkin will be cut out after the glue dries.
A pattern is made using the tissue paper. In the first photo (above) there is an
"AB" pattern with orange, yellow, orange, yellow tissue paper strips. In
the second photo there is a "AAB" pattern of yellow, yellow, orange --- yellow,
yellow, orange. *Note in the photo above --- the first pumpkin does not have
a face. If your school district discourages Halloween activities, these
pumpkins can be made without a face. We call them "Fall Pumpkins!"
The strips will need to
be handled carefully as they are applied to the paper with wet glue. I
demonstrate how to hold each end of the tissue paper strip and lay it down
flat ---don't slide it! The strips should extend over and past the black
line of the pumpkin. The pumpkin will be cut out after the glue dries.
A pattern is made using the tissue paper. In the first photo (above) there is an
"AB" pattern with orange, yellow, orange, yellow tissue paper strips. In
the second photo there is a "AAB" pattern of yellow, yellow, orange --- yellow,
yellow, orange. *Note in the photo above --- the first pumpkin does not have
a face. If your school district discourages Halloween activities, these
pumpkins can be made without a face. We call them "Fall Pumpkins!"
Finishing the pumpkin:
 It
is probably easier for an adult to cut out the pumpkin after the glue has dried.
I then glue a piece of heavy, roving type yarn on the outside of the pumpkin for
a border or a frame. Black, orange or yellow yarn can be used to finish the pumpkin
or jack-o-lantern.
It
is probably easier for an adult to cut out the pumpkin after the glue has dried.
I then glue a piece of heavy, roving type yarn on the outside of the pumpkin for
a border or a frame. Black, orange or yellow yarn can be used to finish the pumpkin
or jack-o-lantern.

The large pumpkins used on this bulletin board were made with orange, butcher paper (bulletin board type paper.) I drew two very large pumpkins --- cut two the same size. I then cut them out and used the scraps that were left over to stuff inside the pumpkin and stapled the outside edges all around the pumpkin --- like a stuffed animal for a 3D effect! I made three pumpkins in different sizes and stapled them on the bulletin board. I used a big piece of green bulletin board type paper for the vine and twisted it --- you have to keep twisting until it starts to look like a cord. It does take quite a bit of green paper to make a long, long vine. Also, it is easier to do with two people twisting. You can make the vine in several sections and then staple them on the board to look like one, continuous vine. I added a bit of raffia to make it look like a real pumpkin patch. These large pumpkins can be left up on display through Thanksgiving.

This is another photo taken that was done another year. The polka dot fabric background is always difficult to photograph. But, it does show a better picture of the large pumpkins!
 The banner will print in three sections. You will need to put
the banner together and cut around the outside edge. I tape the three
pieces together and usually do a
"bubble" cut around the edges of the letters. (see sample)
Then the banner is mounted on a piece of colored construction paper laminated. **Note --- you can also set your printer to print the banner
in black ink, too!
The banner will print in three sections. You will need to put
the banner together and cut around the outside edge. I tape the three
pieces together and usually do a
"bubble" cut around the edges of the letters. (see sample)
Then the banner is mounted on a piece of colored construction paper laminated. **Note --- you can also set your printer to print the banner
in black ink, too!
Sorting Pumpkins


I use white drawing paper or regular copy paper for the worksheet. Students color each pumpkin with crayon and cut out. We used green paper to glue the pumpkins in order by size -- from smallest to largest. The green paper was cut 6" x 18" and then a smaller 6" x 9" was glued on the end. If you have longer drawing paper available, it might work better than gluing the pieces together.
Print pages and collate into books. Students illustrate pages to go with the text on student pages 1-3.
Students illustrate page 4 to go with text.
Copy on orange paper. Each student cuts the pumpkin into small pieces to illustrate page 5 --- "Cut them up in pieces small." Students color page 6 & 7.
Columbus Day


The hat pattern was copied on white construction paper (or drawing paper) and the children used crayons to color the small design on the hat.
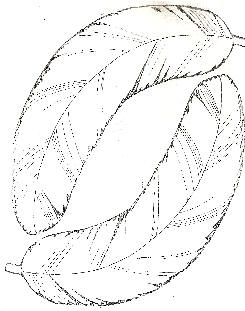
The feather pattern was copied on different colors of construction paper and each child chose which color they wanted. The feathers were cut out by the students and adult stapled to the hat.
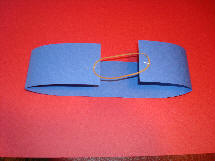
The hat is attached to a strip of heavy paper and fit to each child's head. You can use tagboard type paper that is cut to fit each child's head and about 2 ½ wide. I recently discovered a new way to make an "adjustable" construction headband. An 18 x 2 ½ inch piece of construction paper is cut for each child. A rubber band is stapled to each end of the construction paper strip to make it stretch to fit. This is a bit tricky to staple, but it is a great way to have the headbands prepped ahead of time that will fit every child's head! See photo.
Columbus Day Boats
 The boat are made using brown
tempera paint to stamp each child's handprint three times for each of the boats.
I use manila colored, drawing paper for the handprints. The handprints were
cut out by an adult. The "boats" were glued on a 12x18 piece of blue
construction paper. The PDF file can be copied for the children to trace
the outside edge with red crayon or makers. Then the sails are cut out and
glued on top of the boats. A black crayon is used to make the lines from
the boats to connect to the sails. The silver glitter is added for the
waves. We made lines with white glue and then the children sprinkled the
glue on top of the glue. The names of the three boats can be added.
The boat are made using brown
tempera paint to stamp each child's handprint three times for each of the boats.
I use manila colored, drawing paper for the handprints. The handprints were
cut out by an adult. The "boats" were glued on a 12x18 piece of blue
construction paper. The PDF file can be copied for the children to trace
the outside edge with red crayon or makers. Then the sails are cut out and
glued on top of the boats. A black crayon is used to make the lines from
the boats to connect to the sails. The silver glitter is added for the
waves. We made lines with white glue and then the children sprinkled the
glue on top of the glue. The names of the three boats can be added.

The Little Orange House
The Little Orange House is a story that you use a piece of orange paper to cut as you tell the story. At the end of the story, you have a cute jack-o-lantern picture! The kids love this and ask for me to do it over and over! This is best to practice before doing with the class. I will do my best to explain the different cuts! I have also provided the graphics for you to use as flannel board pieces if you would like to have them to tell the story.
Witch PDF file. There are two different witch pictures for you to choose which one you like best. The witch and ghost can be printed on cardstock paper and then laminated for use on a flannel board. Velcro (hook side only) can be attached to the back of the witch and ghost.
 replace
with picture of both witches and the ghost like the PDF
replace
with picture of both witches and the ghost like the PDF
Little Orange House Ghost Story PDF
Once upon a time a very small witch was walking in the woods. The cold wind was blowing the dry leaves all around her. The little witch was frantically searching for a house for the winter. She could not find one.
Suddenly
a piece of orange paper, blown by the wind, landed at her feet. She picked it up. The
little witch looked closely at the paper and then she said, "I shall make myself a little house
from this piece of orange paper."
She folded the paper in half.
Then she took her scissors (she always carried a pair in her pocket) and
cut off the two corners to make a roof.
Hold the paper on the fold and cut off the two top corners (all four corners will be cut to make a roof, but also a pumpkin shape)
"This will do just fine," she said as she looked at her new house. "But I will need a door." With her scissors she cut a door. Since witches always wear pointed hats, she cut a special door. It looked like this.
Make the cut like a rectangle, door shape but with an angle pointing up for a smiling mouth. (see photo for how to cut)
The little witch walked through the door into the little orange house. It was very dark inside. She quickly hurried back out.
"I will need to make windows to
let in the light," said the little witch.
She cut a front and back window that
looked like this.
This cut is rather tricky. You need to refold the paper (to space the eyes at the side of the head!) and cut through all of the layers to make two eyes at the top of the paper. Practice!
Oh, it was a very fine looking house. Her very own little house with a roof, a door and windows was all finished. But just as the little witch started to go inside for the winter, she saw a tiny ghost floating down the windswept path. As the tiny ghost came to a stop near the little house, the little witch saw that she was crying.
"Why are you crying?" asked the little witch.
The tiny ghost stopped crying and
answered, It is cold and windy. It is getting dark. And I have no place to
spend the winter."
"You may spend the winter with me in my new house, said the kind little witch.
"Oh, thank you," the happy tiny
ghost said as she peeked in through the window. This is a very nice
house,"
"First," said the little witch,
"I will need to make you a little door of your very own. She took her
scissors again and began to cut. She cut a very tiny door. It looked like
this.
This cut is the nose of the jack-o-lantern. Make a small triangle type cut between the eyes and the mouth.
The two happy new friends went inside. The tiny ghost went in the very little door, and the little witch went through her own special door. All winter long they lived happily together inside the little orange house.

Complete directions and pictures PDF
Pasta Skeleton


 October is a great time to do a short unit on
the skeleton for health/science. The children love learning about their
bodies and especially the skeleton! There are several good fiction and
non-fiction books available that I have used. I have found these
available new and used from Amazon.com. There are great buys in used books
from Amazon, but you do have to pay the shipping and that can get expensive when
ordering from different vendors.
October is a great time to do a short unit on
the skeleton for health/science. The children love learning about their
bodies and especially the skeleton! There are several good fiction and
non-fiction books available that I have used. I have found these
available new and used from Amazon.com. There are great buys in used books
from Amazon, but you do have to pay the shipping and that can get expensive when
ordering from different vendors.

We read the book about our skeleton (this is available used from Amazon.com) And, I used a poster to talk about our skeleton. The children are always amazed at how many bones are in our bodies. There are lots of visual kinds of skeletons available for purchase during the Halloween season.
Enchanted Learning also has information there about the human skeleton --- great resource!
This is the url for the human skeleton:
http://www.enchantedlearning.com/subjects/anatomy/skeleton/Skelprintout.shtml

The pasta skeletons are made with the following pastas:
1. Shell for the head
2. Penne pasta for the arms and legs
3. Rotini pasta for the spine
4. Macaroni pasta for the ribs
5. Bow Tie pasta for the pelvis
6. Curly type noodles for the feet
It is nice if you can team up with another teacher and share pasta. There is enough pasta in most packages for several classes to share.
Children are given a 9x12 inch piece of construction paper and follow the sample or use the skeleton poster to complete their skeleton. I have found that using a plastic lid from a coffee can works well for using white glue. If you let the glue dry overnight, you can peel the white glue off --- no washing! Student can dip the pasta in the glue --- Hopefully they don't put too much glue on the pasta. We talk about having the legs and arms going in different ways so that not all of the skeletons look exactly the same!
Dem Bones

Dem Bones candy that was in the shape of bones has been available in all the stores during the Halloween season until recently. In the last few years, I have had to purchase the candy from Oriental Trading Co. It is called "Candy Bones." We used the candies to count and complete the graph.
Five Little Pumpkins

Five Little Pumpkins has been a favorite October poem for many years. This is great for phonemic awareness, too!
Materials needed:
5 orange squares cut 2x2" for pumpkins
1 yellow square cut 2x2"
4 strips of brown construction paper for the fence
1 green construction rectangle cut 3"x12"
1 blue construction construction paper 9x12"
Five pieces of green construction paper for stems (approximately 1/4" x 3/4")
Directions:
1. The children tear one long edge of the green rectangle to make the grass. This is a bit difficult for the children to do, but we tell them to use their fingers like scissors. This piece is glued to the bottom of the blue paper --- torn side facing up.
2. Fold two of the long strips of brown in half and cut on the fold. These will make the vertical fence posts. Glue the fence posts vertically tucking under the grass. Then glue the other two pieces of brown rectangles (horizontal) on top of the posts for the rails.
3. We demonstrate how to cut the corner of each orange rectangle and then cut the points to make a circle. Cut all of the orange squares into circles. Use a black crayon to make a face on each pumpkin.
4. Cut the corners and points on the yellow square. Make a face.
5. Glue the small green pieces on the top of each pumpkin for the stem.
6. Glue the small Five Little Pumpkin poem on
the back.

Student copy of "Five Little Pumpkin" poem PDF

Teacher copy of "Five Little Pumpkins" poem PDF.
The Chocolate Chip Ghost

Print the Chocolate Chip story and the ghost pictures to tell the story. You can print the ghost pictures on cardstock paper, laminate and attach a piece of Velcro (hook side) on the back of each piece to make a flannel board story. Fun story!

Chocolate Chip Ghost Story PDF


October Bingo
The children love playing Bingo, and this is a fun way to build vocabulary and improve listening skills. Each child is given a set of Bingo pictures that they will need to cut out on the lines. Each square is glued on the blank Bingo grid. I always have them discard one of the cards since there is one square that isn't covered (BINGO.) This is an easy way to make sure that you have different cards. It's also another way to build those small muscles in the hands!
Print one of each of the grids for students to cut apart on the lines. Glue one picture in each square of the blank grid to play Bingo.

Print one for each student.
Alphabet Card Game
 Boo is an
alphabet card game that can be played with as many as six or seven children.
Or, it can be played with only two. You can play the game for alphabet
letter identification or for letter sounds. I copy the cards on cardstock
(heavy) paper, but you could use construction paper, too. There are four
pages of cards with extra Boo cards. You might not want to use all of the
BOO cards.
Boo is an
alphabet card game that can be played with as many as six or seven children.
Or, it can be played with only two. You can play the game for alphabet
letter identification or for letter sounds. I copy the cards on cardstock
(heavy) paper, but you could use construction paper, too. There are four
pages of cards with extra Boo cards. You might not want to use all of the
BOO cards.
The dealer (adult) flashes a card from the top of the deck to the student. If the student can identify the letter, he/she gets to keep the card. If he/she cannot identify the letter or sound, the next player tries. The game continues with each player. When a player receives a "BOO" card, he/she loses his cards to the dealer! Even though the player loses her/her cards, he or she can continue playing --- they have to start collecting cards again. The person who has the most cards in their hand at the end of the game is the winner! The game continues around and around. You can put a time limit on the game using a timer. We usually set a time at the end of the center, etc. The children absolutely LOVE this game and beg to play it over and over again!

The only prop you need to play the game is a small sheet or cloth that is large enough to cover a student. Everyone sits in a large circle. One child is chosen to leave the room (or hide eyes away from the group.) The "ghost" is chosen and sits in the middle of the circle with his body covered! The person who has left tries to guess who is the GHOST! Such a simple game, but Kindergartners love it! I usually play the game by allowing the one guessing to be the next ghost if he/she guesses correctly. Otherwise, I start over with two new people.
Halloween Card

We used a 9x12 piece of black construction paper for our cards. The paper is folded in half and each child's hand is stamped with white tempera paint or acrylic paint. After the paint was dry, we stamped a thumb print for eyes with black paint. You can also use squiggle eyes or draw oval shapes with black crayon for eyes.
.

Each child colors the picture and writes a message to finish the card. The inside is made a little smaller than 8 1/2 x 11 for it to fit inside the 9x12" construction paper. You might need to trim the outside edges.


This activity is for estimating and measuring a pumpkin. We usually take a field trip to the pumpkin patch and each child is able to purchase their own pumpkin. I usually buy a big pumpkin for our classroom. We talk about how big the pumpkin is around and each child is able to take a piece of yarn the size that they estimate is around the middle (widest part.) After everyone has a turn guessing the circumference, we use a different color of yarn to measure the pumpkin. Then we go around the room for each child to decide if their piece of yarn was: TOO LONG, TOO SHORT or JUST RIGHT.
Pumpkin Circumference Graph PDF


This large pumpkin poster was used to make "How Many Seeds in the Pumpkin?" Each child's guess was written next to his/her photo.
Halloween Borders

Each child was given a yellow piece of construction strip that was cut 2 1/2 inches by 12 inches to make a pattern. These fun foam pieces are available in most of the craft stores, Walmart and Target during the Halloween season. Dye cuts could also be used.
Fall Leaves
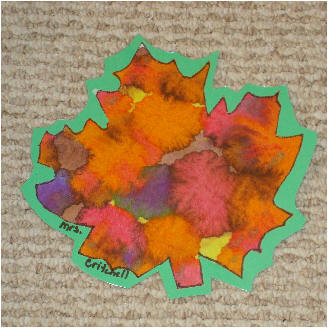

I usually make these leaves using paper towels. Last year I was lucky enough to find them available from Oriental Trading Co. However, they don't seem to be listed this year. So, the directions are given for you to use paper towels.

Any large leaf pattern can be used to trace on the paper towel. I have six different leaf patterns for the children to choose. The tracing should be done by an adult with a Sharpie permanent marker. I have used Liquid Watercolor from Discount School Supply and highly recommend it. Liquid watercolor is a bit expensive, but goes a long ways! The colors are brighter than food coloring, too. It is great to use for dyeing pasta, wooden beads and lots of other things without having to use alcohol. You can put whatever you would like to dye in a plastic bag with a few drops of watercolor and just shake to cover the pasta or beads. But, if you don't have liquid watercolor, you can use food coloring with an eye dropper to blend the colors for the fall leaves. The children love using eye droppers!

Click on the watercolors for a link to Discount School Supply. The watercolor that I use is made by Colorations--Liquid Watercolor.
I do not cut out the leaf until after the children have used the watercolor. Don't forget to put the name on the corner of the paper towel. I put one leaf on a piece of aluminum foil to keep the paint off the table. After the leaves are dry, I cut out the leaves, mount on a complimentary color of construction paper, laminate and display on the bulletin board. See photo above.
I try to do these the first part of
October when we talk about seasons of the year and keep them up until
Thanksgiving.

Thanks again for your purchase. Please let me know if you have any questions.
![]()